 ee
eeHow to Clean the Scanner Glass
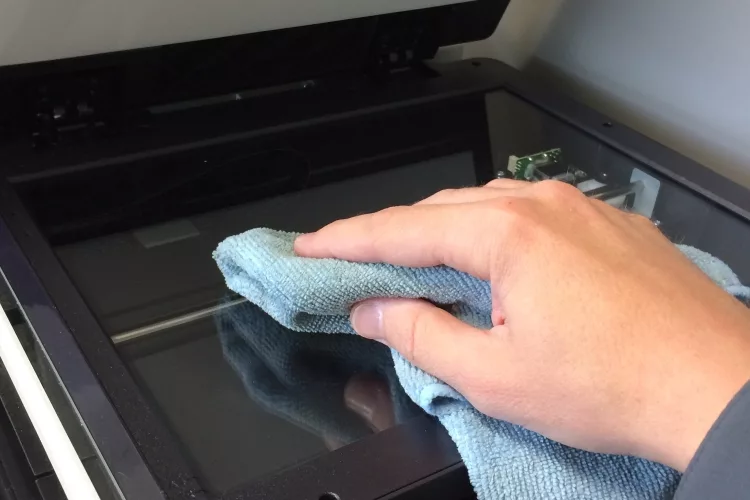
To clean the scanner glass, wipe it with a lint-free microfiber cloth lightly dampened with isopropyl alcohol — that's the short answer. Knowing how to clean the scanner glass correctly takes under five minutes, but doing it wrong can scratch the surface or leave worse streaks than before.
Most scan quality problems — lines, shadows, faded areas — trace back to a dirty glass surface. Whether you own a flatbed scanner, an all-in-one printer, or a document feeder, this guide covers every scenario. For an overview of current scanner models, see our scanner reviews page.
Contents
Why Scanner Glass Gets Dirty
The scanner glass is a high-contact surface. Every document, photo, or book you place on it transfers oils, dust, and microscopic debris. Over time the residue builds in layers that are invisible until they show up as artifacts in your output.
Types of Contamination
- Fingerprints and skin oils — the most common culprit; leave smudgy halo patterns across scans
- Paper dust — accumulates from repeated document scanning; causes fine grey specks throughout
- Toner and ink transfer — freshly printed pages can deposit faint residue (see also: how to remove printer ink from surfaces)
- Adhesive residue — from sticky notes, tape strips, or label backing left on documents
- Environmental dust — settles on the glass when the lid is open or the unit is stored uncovered
How Dirt Affects Scan Quality
A dirty scanner glass doesn't just look bad — it degrades every scan you produce:
- Vertical or horizontal lines running through documents (most common with ADF scanners)
- Soft or blurry areas where smudges scatter the internal light source
- Uneven brightness across the scanning surface
- Dark spots or faint "ghost" images from previous documents
- Muted colors on photo scans that otherwise appear sharp
Supplies You Need
You don't need a specialist cleaning kit. The right materials are likely already in your home or office.
Cleaning Agents Compared
| Cleaning Agent | Effectiveness | Safe for Scanner Glass? | Notes |
|---|---|---|---|
| Isopropyl alcohol (70–90%) | Excellent | Yes | Evaporates fast, leaves no residue — best all-round choice |
| Distilled water | Good | Yes | Safe but slow to evaporate; suitable for light dust only |
| Lens cleaning spray | Excellent | Yes | Designed for optical surfaces; safe on coated glass |
| Ammonia-free glass cleaner | Moderate | Conditional | Verify ammonia-free on the label; standard formulas cloud coatings |
| Paper towels or tissues | Poor | No | Wood pulp fibers micro-scratch optical coatings — avoid entirely |
| Tap water | Poor | No | Mineral deposits leave new streaks after drying |
Your cleaning kit should include:
- Two lint-free microfiber cloths
- Isopropyl alcohol (70% or higher)
- Compressed air can (optional, for dust removal first)
- Cotton swabs (for edges and corners)
How to Clean the Scanner Glass Step by Step
Flatbed Scanner
- Power off the scanner. Unplug it or switch it off — never clean powered electronics.
- Open the lid and remove all documents from the glass surface.
- Blow off loose dust first with compressed air held at a 45-degree angle. This prevents grinding particles into the coating during wiping.
- Dampen one microfiber cloth lightly with isopropyl alcohol. The cloth should be moist, not wet — a few drops is enough.
- Wipe in straight lines from one end of the glass to the other. Avoid circular motions, which spread contaminants instead of lifting them.
- Buff immediately with the dry second cloth to prevent streaking before the alcohol evaporates.
- Check the underside of the lid (the white or grey scanning pad). Wipe it down with the same method — residue on the pad causes just as many artifacts as dirty glass.
- Clean edges and corners with cotton swabs dipped in alcohol.
- Allow two minutes to dry fully before closing the lid and powering on.
ADF Glass Strip
Automatic Document Feeders have a separate, narrow glass strip — usually a thin rectangle beneath the ADF paper path. This is the most overlooked part of how to clean the scanner glass, and the leading cause of vertical lines in scanned documents.
- Open the ADF cover (a separate panel from the main flatbed lid).
- Locate the narrow glass strip — typically 1–2 cm wide, running the full paper width.
- Wipe with a microfiber cloth dampened with isopropyl alcohol, using light pressure.
- Clean the white roller or backing strip directly opposite the glass.
- Run a test scan of a blank white page to confirm lines have cleared.
Pro tip: If vertical lines persist after cleaning the ADF strip, look for a tiny paper fragment or label scrap caught in the document path — a sliver smaller than 2 mm can produce a line through every single page.
Mistakes That Make Things Worse
Most scanner glass damage is caused by the cleaning process itself, not by normal use. The following errors are easy to make and hard to undo.
Chemicals to Avoid
- Ammonia-based cleaners (standard Windex, many multi-surface sprays) — degrade anti-reflective coatings with repeated use
- Acetone or nail polish remover — dissolves plastic borders and permanently clouds coated glass
- Bleach or disinfectant wipes — too harsh; leave chemical residue that scatters the internal light source
- Vinegar — acidic and can etch coatings with repeated application
Similar chemical caution applies to other optical surfaces in your office. The same rules about safe solvents apply when you clean a projector lens — coatings on both surfaces react poorly to the same harsh chemicals.
Wrong Technique
- Spraying liquid directly on the glass — liquid can seep under the frame or into internal components; always apply to the cloth first
- Using paper towels or tissues — wood pulp fibers micro-scratch optical coatings even when they feel soft
- Pressing too hard — light pressure is always sufficient; excessive force risks cracking older glass or leaving visible pressure marks
- Cleaning while powered on — movement of the scan head during wiping can damage the internal mechanism
- Forgetting the lid pad — a clean glass with a dirty white pad still produces streaks and shadow artifacts
Long-Term Scanner Maintenance
Cleaning the glass reactively only when you notice a problem works, but a simple routine keeps quality consistently high and extends the scanner's working life — much like keeping up with toner cartridge maintenance instead of waiting for print failures.
Cleaning Schedule
- Light users (under 50 pages/week): clean monthly, or whenever you notice quality drop
- Moderate users (50–200 pages/week): clean every two weeks
- Heavy users (200+ pages/week): clean weekly; inspect the ADF strip after every large batch run
Protecting the Glass Between Uses
- Always close the lid when the scanner is not in use — dust accumulates quickly in office environments
- Never leave documents face-down on the glass for extended periods; ink and adhesive can transfer
- Keep the scanner away from direct sunlight and high humidity — thermal cycling loosens the adhesive seal around the glass frame
- For extended periods of non-use, lay a sheet of clean white paper on the glass before closing to act as a dust barrier
Maintaining all your office equipment on a consistent schedule keeps your workflow smooth. Our guides on how to use the Scotch TL901 laminator and how to unblock a Fellowes laminator follow the same principle — small regular actions prevent larger failures.
Diagnosing Scan Quality Issues
Not every scan problem comes from dirty glass. Use the symptom list below to confirm the cause before you spend time cleaning something that may not be the issue.
Common Symptoms and Causes
- Vertical lines through every scan → dirty ADF glass strip (most likely) or a scratch on the flatbed glass
- Smudgy or hazy area → fingerprint or adhesive residue on flatbed glass
- Consistent dark edge on one side → lid not closing fully, or debris in the hinge
- Faded or washed-out colors on otherwise sharp scans → lamp degradation, not a glass issue
- Random black dots scattered unevenly → paper dust; clean the glass and white backing pad together
- Lines only when using ADF, not flatbed → ADF strip is dirty; the main flatbed glass is fine
When Cleaning Is Not Enough
If knowing how to clean the scanner glass doesn't resolve the issue after two thorough attempts, the problem is likely mechanical or optical:
- Scratched glass — a permanent scratch creates a line no cleaning removes; the glass must be replaced
- Cracked or chipped glass — do not continue scanning; glass fragments can damage documents and the scan head
- Lamp or CCD degradation — if brightness or color remains off with clean glass, internal components need professional servicing
- Calibration issues — some scanners ship with a calibration sheet; run calibration after any deep clean to reset the reference white point
For home-office setups where the scanner is part of a broader workstation, a reliable environment matters. Our guide on choosing a laptop for working from home covers building a dependable desk setup, and for mobile document handling on the go, see our picks for the best business tablets.
Key Takeaways
- Dampen a microfiber cloth with isopropyl alcohol and wipe in straight lines — this is the safest and most effective method for how to clean the scanner glass
- Always clean the ADF glass strip separately from the flatbed; it is the most overlooked surface and the most common cause of persistent vertical lines
- Never use ammonia-based cleaners, paper towels, or spray liquid directly onto the glass — these cause more damage than the dirt they remove
- Set a regular cleaning schedule based on your scan volume; consistent maintenance prevents quality issues from developing in the first place
Frequently Asked Questions
How often should you clean scanner glass?
For light users scanning fewer than 50 pages per week, a monthly clean is sufficient. Moderate users should clean every two weeks, and heavy users in document-heavy offices should clean weekly and inspect the ADF strip after every large batch.
Can I use Windex to clean my scanner glass?
Only if the formula is ammonia-free. Standard Windex contains ammonia, which degrades anti-reflective coatings on scanner glass over time. Check the label carefully, or use isopropyl alcohol instead — it is safer and more reliable.
Why are there vertical lines in my scans?
Vertical lines that appear on every scan are almost always caused by a dirty ADF glass strip — the narrow glass beneath the document feeder path. Open the ADF cover, locate the strip, and wipe it with a microfiber cloth dampened with isopropyl alcohol.
What is the best cloth to clean scanner glass?
A lint-free microfiber cloth is the only safe option. Paper towels, tissues, and cotton rags all contain fibers that micro-scratch optical coatings on scanner glass. Use two cloths — one lightly dampened with isopropyl alcohol, one dry for buffing.
Can a scratched scanner glass be fixed?
No — scratches in the glass itself are permanent and cannot be buffed out. A scratch that causes a visible line in every scan requires glass replacement. Contact the scanner manufacturer or a qualified service center for a replacement glass panel.
How do I know if the problem is the glass or something else?
Run a test scan using the flatbed only (no ADF). If lines or artifacts still appear, clean the flatbed glass and the white lid pad. If the scan is clean on flatbed but shows lines via ADF, the problem is the ADF glass strip, not the main glass.
Is it safe to clean the scanner glass while it is powered on?
No. Always power off and unplug the scanner before cleaning. The internal scan head moves during operation, and wiping a live scanner risks damaging the mechanism. Allow the unit to sit for a minute after powering off before opening the lid.
 |
 |
 |
 |

About Rachel Chen
Rachel Chen writes about scanners, laminators, and home office productivity gear. She started her career as an office manager at a midsize law firm, where she was responsible for purchasing and maintaining all of the document handling equipment for a 60-person staff. That experience sparked a deep interest in archival workflows, paperless office setups, and document preservation. Rachel later earned a bachelor degree in information science from Rutgers University and now writes full time. She is a strong advocate for ADF reliability over raw resolution numbers and has tested every major flatbed and document scanner sold in the United States since 2018.