 ee
eeScanners ›
How to Use a Portable Document Scanner
If you've recently picked up a compact document scanner and you're wondering how to use the tiny scanner effectively, you've come to the right place. These handheld and portable devices have become essential tools for home offices, students, and professionals who need to digitize receipts, contracts, photos, and notes on the go. Whether you're using a wand-style scanner, a sheet-fed mini device, or a clip-on smartphone accessory, mastering the basics will save you time and frustration. Our scanner guides and reviews cover a wide range of models, but this article focuses on the practical steps anyone can follow to get great scans from a small device.
Tiny scanners have come a long way. Early models produced blurry, uneven scans, but today's compact hardware delivers crisp resolution suitable for archiving, sharing, and even optical character recognition (OCR). Understanding the setup process, the software, and the best scanning techniques will help you get professional results from a pocket-sized device.
Contents
What Is a Tiny Scanner and Who Needs One?
A tiny scanner is a compact, portable scanning device designed to capture digital images of physical documents, photos, business cards, and other flat media. Unlike traditional flatbed scanners that sit on a desk and require a computer connection, tiny scanners are built for mobility. Many connect via USB, Bluetooth, or Wi-Fi, and several are powered entirely by battery — making them practical for fieldwork, travel, and remote offices.
Types of Tiny Scanners
Before you learn how to use the tiny scanner you own, it helps to understand which category it falls into, since setup and operation vary by type:
- Wand scanners: Handheld devices you drag manually across a page. Lightweight and battery-powered, ideal for scanning newspapers, books, or oversize documents.
- Sheet-fed portable scanners: You feed the page into a slot and the device pulls it through automatically. Great for contracts, receipts, and single sheets.
- Smartphone scanner apps with clip-on lenses: Use your phone's camera combined with software to produce document-quality scans.
- Card scanners: Narrow slot-fed devices optimized for business cards, ID cards, and credit card-sized documents.
- Instant photo scanners: Compact units that feed printed photos through and produce high-resolution digital copies.
Common Use Cases
Tiny scanners are used across many settings. Students scan lecture notes and textbook pages. Real estate agents digitize signed contracts on the spot. Small business owners archive receipts for tax purposes. Travelers scan passports and travel documents as backups. Collectors digitize rare photos and memorabilia without handling originals excessively. If you already rely on portable tech like a tablet for taking notes, adding a portable scanner to your toolkit is a natural extension of that mobile workflow.
Setting Up Your Tiny Scanner
Proper setup is the foundation of good scans. Rushing through this phase leads to connectivity issues, software conflicts, and poor image quality. Take a few minutes to do it right.
Hardware Setup
Start by charging or inserting batteries into your device, following the manufacturer's instructions. For USB-powered scanners, connect to a computer or a USB power adapter before first use to ensure the internal firmware is initialized. If your scanner has a micro SD card slot for onboard storage, insert a formatted card before powering on.
For sheet-fed models, check the paper guide width. Most allow you to adjust for A4, letter, and narrower documents like receipts. Keeping the guide set correctly prevents skewed scans. For wand scanners, attach any included calibration sheet to the bottom or side sensor and run the calibration process as described in your manual — this sets the baseline for color accuracy.
Software and App Installation
Most tiny scanners come with companion software on a disc or via a download link. Install it on your computer or phone before connecting the scanner via USB or Bluetooth pairing. Common software bundled with portable scanners includes ABBYY FineReader (for OCR), NewSoft Presto! BizCard (for card scanners), and various vendor-branded scan utilities.
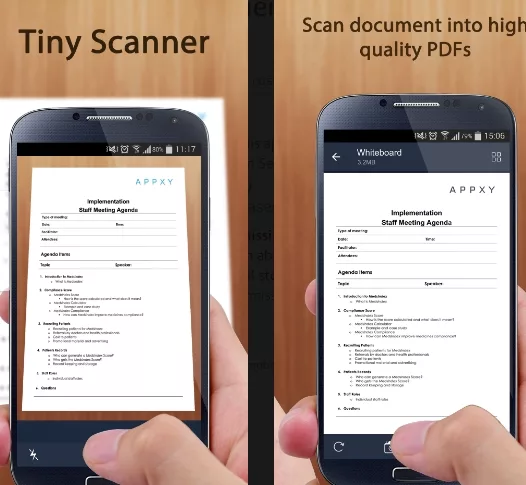
For smartphone-based scanning apps like TinyScan Pro or Adobe Scan, download directly from the App Store or Google Play, grant camera and storage permissions, and follow the in-app tutorial. Pairing a Bluetooth wand scanner to a phone typically involves holding the pairing button until an LED flashes, then selecting the device from your phone's Bluetooth menu.
How to Use the Tiny Scanner Step by Step
Now for the core of the process. Knowing how to use the tiny scanner correctly depends on your document type and scanner model, but the following steps apply to most devices.
Scanning Documents and Receipts
- Power on the scanner and wait for the indicator light to signal readiness (usually a solid green LED).
- Set the resolution using the button or toggle on the device. For standard documents, 300 DPI is sufficient. For text you plan to OCR, use 300–600 DPI. For photos, use 600 DPI or higher.
- Select the scan mode — color, grayscale, or black-and-white. Use color for photos and branded documents; grayscale for text-heavy content to reduce file size.
- Position or feed the document:
- Sheet-fed: Align the top edge of your document with the feed slot guides and gently push it in until you feel the rollers grip. Press the scan button. The device pulls the page through and ejects it from the other side.
- Wand: Place the wand at the top of the page, ensuring the sensor head is flush with the surface. Press and hold the scan button, then draw the wand steadily downward at a consistent speed — roughly 3–5 seconds per A4 page. Uneven speed causes scan lines.
- Review the scan on the companion app or software. Check for skew, shadows, or missing edges before saving.
- Save or export the file in your preferred format (PDF or JPEG for most use cases).
For receipts and narrow slips of paper, use the narrow-page guide if your scanner has one, or fold a receipt into portrait orientation to keep it flat as it feeds through. Thermal receipt paper can jam in some sheet-fed models — if your scanner manual warns against thermal paper, use the wand or photograph the receipt instead.
Scanning Photos and Artwork
Photos require a bit more care. Dust and fingerprints on the scanner's sensor or glass will show up in high-resolution scans. Wipe the sensor or glass with a lint-free cloth before scanning prints. Lay the photo face-down on a flat surface for wand scanning — this prevents the paper from curling away from the sensor as you drag.
For a batch of photos, consider a sheet-fed photo scanner with a multi-feed tray. These accept standard 4×6 and 5×7 prints and can process dozens in a single session. If you're scanning old, brittle prints, handle them only by the edges to avoid adding new fingerprints or causing damage. Archiving family photos is one of the most rewarding uses of a portable scanner — and the results can be easily transferred to a USB flash drive or tablet for safekeeping.
Optimizing Scan Quality and Settings
Understanding scan settings lets you balance quality against file size — a trade-off that matters when you're scanning hundreds of pages.
Resolution, Color Mode, and File Format
DPI (dots per inch) is the most important quality setting. Higher DPI captures more detail but produces larger files. For text documents you plan to print, 200–300 DPI is ideal. For OCR processing, 300 DPI is the minimum most OCR engines recommend. For photos you want to print at 8×10 inches or larger, aim for 600 DPI or higher.
Color mode affects both quality and file size. Color mode captures the full spectrum but creates larger files. Grayscale is excellent for black-and-white documents and reduces file size by roughly 70%. Black-and-white (bitonal) mode is the most compressed and works well for high-contrast text but loses shading entirely.
File format choices matter for your workflow. PDF is universally preferred for multi-page documents and preserves layout. JPEG works well for photos. TIFF is lossless and preferred for archival quality but produces very large files. PNG offers lossless compression at smaller sizes than TIFF, making it a good middle ground for graphics and illustrations.
Tiny Scanner Settings at a Glance
| Use Case | Recommended DPI | Color Mode | File Format | Approx. File Size (A4) |
|---|---|---|---|---|
| Standard text document | 200–300 DPI | Grayscale | 50–150 KB | |
| OCR (text extraction) | 300–400 DPI | Grayscale or Color | PDF / TIFF | 150–400 KB |
| Color brochure / form | 300 DPI | Color | PDF / JPEG | 300 KB – 1 MB |
| Photo (4×6 print) | 600 DPI | Color | JPEG / TIFF | 2–8 MB |
| Archival photo | 1200 DPI | Color | TIFF | 20–80 MB |
| Business card | 300 DPI | Color | JPEG / PDF | 100–300 KB |
| Receipt (thermal) | 200 DPI | Grayscale | PDF / JPEG | 30–80 KB |
Saving, Organizing, and Sharing Your Scans
Digitizing documents is only useful if you can find and share them later. A consistent filing system makes all the difference.
Cloud and Local Storage Options
Most scanner apps integrate directly with cloud services. Google Drive, Dropbox, OneDrive, and Evernote are the most commonly supported platforms. After scanning, tap the share or export button in your app and choose your preferred destination. For sensitive documents, enable encryption in your cloud storage settings before uploading.
For local storage, organize scans into clearly named folders — by year, project, or document type. A structure like Documents/Scans/2024/Receipts/ makes retrieval fast. If you're using a scanner with a built-in SD card, copy files to a computer regularly to avoid losing data if the card is lost or corrupted.
Naming convention matters more than most people realize. Instead of letting software generate names like IMG_0042.jpg, rename files immediately after scanning. Something like 2024-03-15_TaxReceipt_Amazon.pdf is searchable and self-explanatory years later.
Sending Scans to a Printer or Other Devices
One common workflow is scan-to-print: you scan a document, make annotations on your phone or computer, then print the updated version. For this to work smoothly, your scanner app should support direct export to print dialogs. On iOS and Android, the native share sheet connects to any AirPrint or Mopria-compatible printer. If you're printing wirelessly from a computer, make sure your printer drivers are up to date — check our guide to the best wireless printers for Mac if you're shopping for a companion printer.
You can also send scans via email directly from most scanner apps. Tap the share button, choose your email client, and the scan is attached automatically as a PDF or image. For business use, many apps support direct-to-fax services and integration with document management platforms like DocuSign and SharePoint.
Tips, Tricks, and Troubleshooting
Even after you've mastered how to use the tiny scanner, occasional hiccups are inevitable. Here's how to handle the most common issues.
Common Problems and Fixes
Skewed or crooked scans: For sheet-fed models, check that the paper guide is snug against the document edge. For wand scanners, practice a straight, even drag on a piece of blank paper first. Many apps include an auto-straighten or deskew feature — enable it in settings.
Blurry or low-contrast results: Clean the sensor glass with a dry, lint-free cloth. If scanning with a phone camera, ensure the lens is clean and lighting is even. Avoid scanning in direct sunlight, which creates harsh shadows. A desk lamp positioned at a 45-degree angle provides consistent illumination.
Scanner not recognized by computer: Try a different USB port or cable. Ensure the scanner's driver software is installed. On Windows, open Device Manager and look for any unknown devices with yellow warning icons. Reinstall the driver if needed. On Mac, check System Information under the USB section to see if the device is being detected at all.
Pages feeding unevenly or jamming: Check for dog-eared corners or folded edges before feeding. Don't force oversized documents through a slot that's too narrow. For small models, stick to single sheets rather than stacking multiple pages — most portable sheet-fed scanners handle one page at a time.
Poor OCR accuracy: OCR works best at 300 DPI or higher. Ensure the scan is sharp and well-lit. Some OCR engines perform better on high-contrast grayscale scans than on color images. If accuracy remains low, try a dedicated OCR tool like ABBYY FineReader rather than the bundled app.
If your scanning setup is part of a broader mobile office arrangement, you might also find it useful to review how to connect other devices — for example, our article on how to connect a printer to a tablet covers wireless and USB-OTG workflows that complement a portable scanner setup.
Advanced Features Worth Exploring
Once you're comfortable with the basics, explore features that go beyond simple document capture:
- Batch scanning mode: Some sheet-fed scanners accept a small stack of pages and scan them in sequence, stitching them into a single multi-page PDF automatically.
- Business card scanning with contact import: Card scanner apps extract names, phone numbers, and email addresses from scanned cards and offer to add them directly to your phone's contact list.
- Stitch mode for wide documents: Wand scanners that support panoramic stitching let you scan a document wider than the sensor by making two passes, which the software combines into one image.
- Whiteboard mode: Available in many smartphone apps, this mode captures handwritten notes or diagrams on a whiteboard, enhances contrast, and crops to the board edges.
- Password-protected PDFs: Some apps let you set a password on exported PDFs, adding a layer of security for sensitive documents.
- Automatic upload triggers: Set your scanner app to auto-upload every completed scan to a specific folder in Google Drive or Dropbox, so nothing is ever lost on the device.
Tiny scanners are a genuinely versatile piece of kit. They complement other portable office equipment remarkably well — in the same way that understanding how to speed up your tablet improves your overall mobile productivity, getting the most from your scanner raises the efficiency of your entire on-the-go setup. With the right settings, a clean sensor, and a consistent filing habit, a compact scanner can handle most of the document management tasks that once required a full-size office machine.
Frequently Asked Questions
How do I use a tiny scanner for the first time?
Start by charging the device or installing batteries, then install the companion app or software on your phone or computer. Connect via USB or Bluetooth, load a test document, and press the scan button. Review the result in the app, adjust settings like DPI and color mode if needed, and save to your preferred location.
What DPI should I use for scanning documents with a tiny scanner?
For standard text documents, 200–300 DPI produces clear, readable files at a manageable size. If you plan to extract text using OCR software, use at least 300 DPI. For photos or detailed graphics, 600 DPI or higher is recommended for best results.
Can a tiny scanner scan photos?
Yes, most portable scanners handle standard-sized photos well. Set the resolution to at least 600 DPI and use color mode for accurate reproduction. For fragile or valuable prints, handle them by the edges only, and wipe the scanner sensor with a lint-free cloth before scanning to avoid dust artifacts.
Why is my tiny scanner producing blurry scans?
Blurry scans are most often caused by a dirty sensor, moving the wand too quickly, or insufficient lighting. Clean the sensor glass with a dry lint-free cloth, slow your wand movement to a steady 3–5 seconds per page, and ensure even lighting. For smartphone-based scanning, also clean the phone's camera lens.
What file format should I save my scans in?
PDF is the most versatile format for multi-page documents and preserves layout for printing. JPEG is well suited to photos. If you need lossless quality for archiving, use TIFF or PNG. For maximum compatibility when sharing with others, PDF is the safest choice.
Can I connect a tiny scanner to a tablet?
Yes. Many portable scanners connect to tablets via Bluetooth or Wi-Fi through the scanner's companion app. USB-connected scanners can work with tablets that support USB OTG (On-The-Go). Once connected, scans are saved directly to the tablet's storage and can be shared, printed, or uploaded to the cloud from there.
 |
 |
 |
 |

About Rachel Chen
Rachel Chen writes about scanners, laminators, and home office productivity gear. She started her career as an office manager at a midsize law firm, where she was responsible for purchasing and maintaining all of the document handling equipment for a 60-person staff. That experience sparked a deep interest in archival workflows, paperless office setups, and document preservation. Rachel later earned a bachelor degree in information science from Rutgers University and now writes full time. She is a strong advocate for ADF reliability over raw resolution numbers and has tested every major flatbed and document scanner sold in the United States since 2018.