 ee
eeHow To Make A Projector At Home
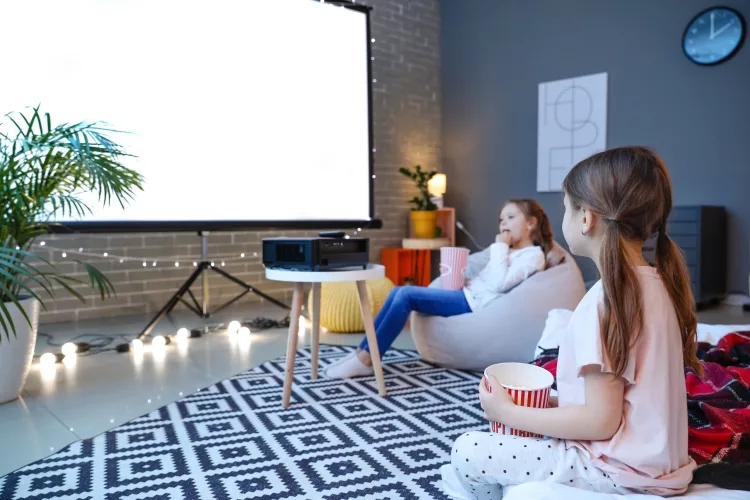
If you've ever wanted a big-screen movie experience without spending hundreds of dollars, learning how to make a projector at home is one of the most satisfying DIY tech projects you can take on. With a cardboard box, a magnifying lens, and a smartphone, you can project images and videos onto a wall or screen in an afternoon. This guide walks you through every step — from gathering materials to troubleshooting image quality — so you can build a working DIY projector that actually delivers results. Whether you're a student, a hobbyist, or just curious about the optics behind projection technology, this project is both educational and practical.
Projectors work by passing light through a focused lens to magnify and throw an image onto a surface. Commercial models use high-powered lamps, precision glass lenses, and digital image processing — but the fundamental principle is the same one you'll exploit when building at home. Check out our full projector buying guide if you later decide to upgrade to a dedicated device.
Contents
What You Need to Make a Projector at Home
Before you start cutting cardboard, gather everything on this list. Having all materials at hand prevents frustrating mid-build interruptions and ensures the best image quality from your first test run.
Essential Materials
- A shoebox or sturdy cardboard box — a standard shoebox works perfectly; thicker cardboard reduces internal light bounce
- A magnifying glass or Fresnel lens — a 3x to 5x magnifying lens with a focal length between 15 cm and 25 cm gives the best balance of brightness and image size; Fresnel lenses are flat and easier to mount
- A smartphone — the brighter the screen, the better; most modern handsets work well
- Black matte paint or black construction paper — to line the inside of the box and kill internal reflections
- A craft knife or box cutter — for precise cutouts
- Hot glue gun or strong adhesive tape
- A ruler and pencil — accuracy here directly affects image sharpness
- A small binder clip or folded card — to hold the phone upright inside the box
Optional Enhancements
- A second, weaker lens — stacking two lenses can improve focus range and reduce chromatic aberration
- A mirror or reflective film — to redirect the light path in a periscope-style build, allowing a smaller footprint
- A mini tripod — to stabilize the projector during long viewing sessions
- A pull-down or roll-up screen — greatly improves image clarity; learn how to set one up in our guide on how to roll up a projector screen
According to Wikipedia's overview of projection technology, the core principle behind any projector — digital or DIY — is the controlled transmission and focusing of light through an optical element. Understanding this helps you make smarter choices about lens selection and box geometry.
Step-by-Step: How to Build Your DIY Projector
These instructions explain how to make a projector at home using the shoebox method — the most reliable approach for beginners. The entire build takes roughly 30–45 minutes once you have your materials ready.
Step 1: Prepare the Box
Start with a clean, intact shoebox. The longer the box, the larger the projected image but the dimmer it will appear — a box between 25 cm and 35 cm long is the sweet spot for indoor use with a smartphone.
- Line the interior of the box with black matte paper or paint all inner surfaces flat black. This is the single most important step for image contrast. Any reflective interior surface will wash out your projection with stray light.
- Cut a circular hole in the center of one of the short ends. The hole should be very slightly smaller than the outer diameter of your magnifying lens so the lens fits snugly without gaps around the edge.
- Cut a second, smaller rectangular opening on the opposite short end — large enough to route your phone's charging cable through if needed.
- Seal all seams and flaps of the box with black tape to block ambient light leaking in from the sides.
Step 2: Install the Magnifying Lens
Remove the handle from your magnifying glass if it has one. Fit the lens into the circular hole you cut, ensuring it sits flush against the exterior face of the box. Apply hot glue around the perimeter of the lens on the inside surface to seal it in place. Allow the glue to cure fully before continuing — a loose lens is the most common source of a blurry image.
If you are using a Fresnel lens (the flat, grooved kind often found in reading aids or salvaged from old rear-projection TVs), cut it to fit the opening and tape it carefully so it is taut and wrinkle-free. Even minor warping in a Fresnel lens will distort the projected image.
Step 3: Position Your Smartphone
This step requires a little experimentation. The phone must rest upside down inside the box — because the lens inverts the image, placing the phone inverted means the projection arrives right-side up on your screen. Use a binder clip, a folded wedge of cardboard, or a small adjustable phone stand to hold the device vertically at the center of the box's cross-section.
Set your phone screen brightness to maximum. Disable auto-brightness. Enable "Do Not Disturb" mode so notifications do not interrupt your session. Open a video or image in full-screen landscape mode.
If you plan to use a tablet with HDMI output as your source device instead of a phone, you can adapt this build by making the box wider, or use an HDMI-to-USB adapter to connect a streaming stick directly to the tablet.
Step 4: Fine-Tune the Focus
With the box assembled, point the lens toward a blank white wall in a darkened room. Slide the phone holder forward and backward inside the box while watching the projected image. At a specific distance from the lens — approximately equal to the focal length of your magnifying glass — the image will snap into sharpest focus. Mark this position on the box floor and fix your phone holder there permanently.
If the image is sharp in the center but blurry at the edges, try reducing the aperture (the effective opening of the lens) by taping a cardboard ring over it, leaving only the central 60–70% of the lens exposed. This is the same principle as stopping down a camera aperture to increase depth of field.
Improving Your DIY Projector's Image Quality
Once you have a working projection, these refinements make the difference between a novelty and a genuinely usable display.
Optimizing Lens Position
The projected image size and focus distance are linked by the thin lens equation: 1/f = 1/do + 1/di, where f is the focal length of your lens, do is the distance from the lens to your phone screen, and di is the distance from the lens to the wall. Moving the projector farther from the wall increases image size but decreases brightness. As a practical rule, a 20 cm focal length lens positioned 22–25 cm from the phone will project a focused image at roughly 2–3 meters.
If the colors look washed out or have colored fringes (chromatic aberration), try a lens with a shorter focal length or move the phone slightly closer to the lens. Cheaper single-element magnifying lenses show more color fringing; achromatic doublet lenses — available inexpensively online — eliminate most of this distortion.
Choosing the Right Projection Surface
A plain white wall works, but a matte white projector screen reflects light much more evenly and produces richer blacks. Avoid glossy or textured surfaces. If you want a portable option, a piece of white blackout fabric stretched over a frame gives excellent results and can be rolled up for storage. Pairing your DIY projector with a proper screen material is one of the highest-impact upgrades you can make.
DIY Projector vs. Commercial Projector
Setting realistic expectations is important. Here is a direct comparison of what a shoebox projector can and cannot do relative to a budget commercial unit:
| Feature | DIY Shoebox Projector | Budget Commercial Projector (~$150–$300) |
|---|---|---|
| Brightness (lumens) | ~5–20 (estimated equivalent) | 2,000–3,500 ANSI lumens |
| Native resolution | Limited by phone screen (720p–1080p source) | 1280×720 to 1920×1080 |
| Throw ratio | Fixed by lens focal length | Adjustable zoom lens |
| Keystone correction | None — physical adjustment only | Manual or digital (±40°) |
| Audio | Phone speaker only | Built-in speaker + audio out |
| Usable in ambient light | No — requires near-complete darkness | Yes — moderate ambient light acceptable |
| Build cost | $5–$20 (lens cost) | $150–$300 |
| Educational value | Very high — teaches optics firsthand | Low — plug-and-play device |
The DIY approach cannot match a commercial projector for brightness or versatility, but it delivers on its core promise: a large image from inexpensive components. For a serious home cinema setup or classroom use, a dedicated device is the right tool. The DIY projector is best viewed as an educational build, a temporary setup for occasional movie nights, or a proof-of-concept before committing to a purchase.
Tips for Getting the Best Results
Small details consistently separate sharp, vibrant DIY projections from dim, blurry disappointments. Apply these tips as you refine your build.
Room Conditions
- Darkness is everything. Even a small amount of ambient light dramatically washes out the image. Blackout curtains or building at night give the best results.
- Projection distance matters. Start at 1.5–2 meters and move further back only if you need a larger image and can accept the brightness trade-off.
- Stable placement. Any vibration during playback blurs the image. Place the projector on a non-slip mat and avoid bumping the table.
- Sound setup. The phone speaker will seem tiny once you have a large image. Connect a Bluetooth speaker or use a headphone splitter to a small amplified speaker for a complete cinema experience.
Source Device Selection
The phone or device you use as the light source affects image quality significantly. Phones with OLED screens produce deeper blacks and richer colors compared to LCD panels, because OLED pixels emit their own light rather than relying on a backlight that bleeds into dark areas. Higher screen brightness and resolution directly improve the final projection. If you use a laptop as a source — for example, connecting it via a mirror app to your phone — consider that the laptop screen's higher resolution will not translate beyond what your phone can display. For students who regularly work with visual content, a capable laptop like those in our guide to the best laptops for Adobe Premiere can serve double duty as both a creative workstation and a projector content source.
When to Upgrade to a Real Projector
The shoebox projector is a fantastic introduction to optical principles and a surprisingly functional entertainment hack — but there are clear signals that it is time to invest in a proper device.
You should consider upgrading when:
- You want to use the projector in any room that is not completely darkened
- You need a screen larger than approximately 60 inches at a satisfying brightness level
- You want to connect external devices such as game consoles, streaming sticks, or a laptop via HDMI
- You plan to use the projector regularly — the DIY build is not durable enough for daily use
- You need reliable autofocus, keystone correction, or lens zoom
Entry-level commercial projectors have dropped considerably in price and now offer 1080p resolution and 3,000+ lumens for a fraction of what they cost a few years ago. If you are already thinking about a full home cinema setup, pairing a good projector with a quality display surface and a capable media source will give you results that a cardboard box simply cannot match. Knowing how to make a projector at home gives you the foundation to understand and appreciate what those extra dollars buy in a commercial unit.
For students building a home workspace on a budget — whether for school, remote learning, or side projects — a projector can serve as a second display. Pair it with one of our recommended best laptops for homeschooling and you have a surprisingly capable home learning station for minimal investment.
Frequently Asked Questions
Can I really make a projector at home that actually works?
Yes — a shoebox projector using a magnifying lens and a smartphone genuinely projects a viewable image. It works best in a completely dark room and produces an image roughly equivalent to a 40–60 inch display at close range. The quality is nowhere near a commercial projector, but it is a real, functional projection based on the same optical principles.
What magnifying lens is best for a DIY projector?
A magnifying glass with a focal length of 15–25 cm and a magnification of 3x to 5x works best for most shoebox builds. Fresnel lenses are a popular alternative because they are flat and easier to mount flush. Avoid very short focal lengths (under 10 cm) as they make focus adjustment difficult and produce significant image distortion.
Why is my DIY projector image upside down or blurry?
An upside-down image means your phone is oriented the wrong way — flip it so the screen faces the lens but the phone itself is inverted (upside down). A blurry image usually means the phone is not at the correct focal distance from the lens. Slide the phone holder slowly forward and backward until the image sharpens. Also ensure all interior box surfaces are painted matte black to eliminate stray reflections.
How large of an image can a homemade projector project?
A typical shoebox projector can produce an image between 30 and 80 inches diagonal, depending on the projection distance. However, brightness drops sharply as image size increases. For a usable, reasonably bright image, keep the projection distance under 2 meters. Beyond that, the image becomes noticeably dim even in a fully darkened room.
Does the type of phone screen affect DIY projector quality?
Significantly. OLED screens produce better contrast and more vivid colors than LCD panels because each pixel emits its own light. A brighter screen also helps — set brightness to maximum and disable auto-brightness. Higher resolution phones (1080p or above) do not necessarily improve the projected image much, since the lens itself limits effective resolution, but they do reduce pixelation at close viewing distances.
Can I use a tablet instead of a phone for a DIY projector?
Yes, and a tablet can actually produce a brighter, larger source image due to its bigger screen. You will need a wider box to accommodate the tablet's dimensions. The trade-off is that larger screens require more precise lens alignment. A tablet with a high-brightness display and good color accuracy works particularly well for this project.
 |
 |
 |
 |

About Sarah Whitford
Sarah Whitford is Ceedo's resident projector and home theater expert. She got her start as a custom AV installer for a regional integrator in the Pacific Northwest, where she designed and installed media rooms and conference spaces for residential and small business clients for over six years. Sarah earned her CTS certification from AVIXA and has personally calibrated more than 150 projectors using Datacolor and SpyderX colorimeters. She is opinionated about throw distance math, contrast ratios, and the realities of ambient light, and she will happily explain why most people should not buy a 4K projector. Sarah lives in Portland with her partner and an aging Akita.